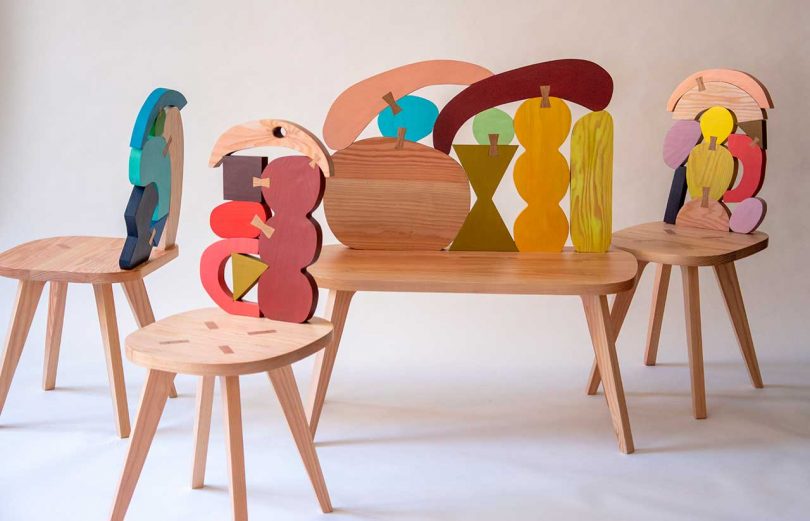
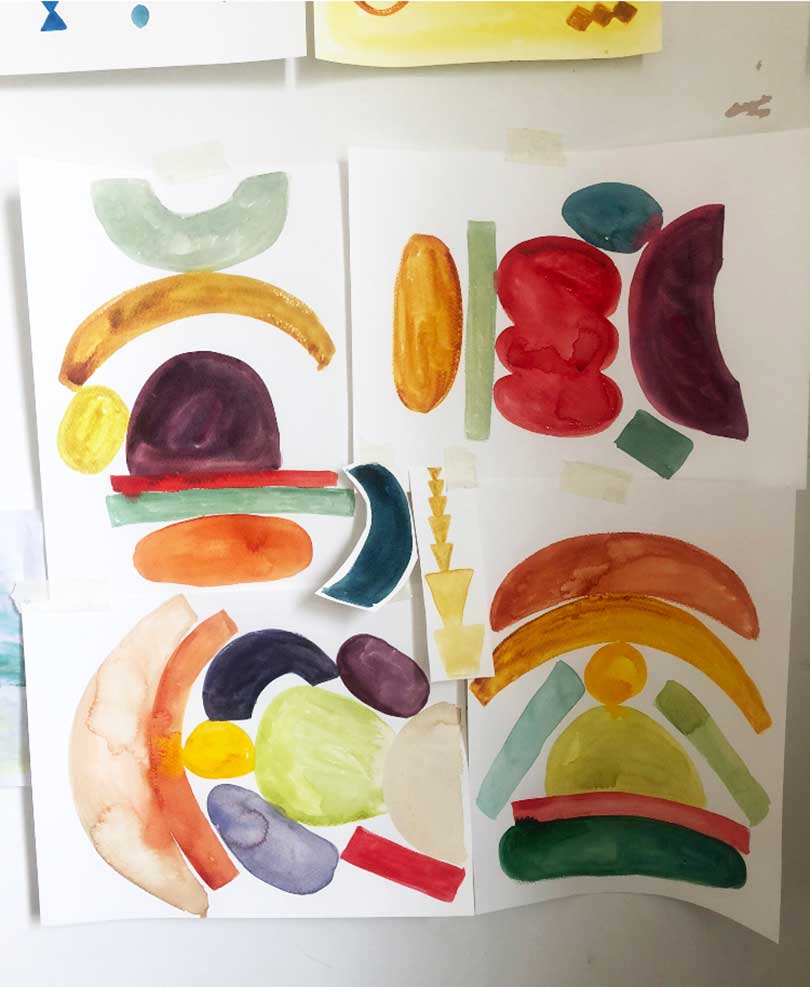
Last year we fell hard for a project designed by Donna Wilson, a London-based artist + designer known for her use of whimsical patterns and bold colors. Abstract Assembly carries on with both while transforming her watercolor paintings into three-dimensional forms that have become the colorful feature on the series of chairs. The wooden components are made from offcuts that are hand painted in various colors and then joined together using traditional joinery. After being fit together like a puzzle, they’re attached to chair and bench bases to become playful + sculptural, limited-edition seating you won’t see anywhere else. In this month’s Deconstruction, Wilson shares with us the idea behind the project and how the chairs are made.
The initial idea for Abstract Assembly came to me as I reassessed all my work. I was running a successful business for 17 years, and I needed a break. I found myself in a small fishing village from my childhood, on my own, and I began to draw, walk and breathe. Up till this point my work was quite figurative, graphic and colorful. Through this process I felt like I wanted to try something that wasn’t expected of me, and so the abstract shapes appeared.
I got back to London and every evening, after I’d put my kids to bed, I’d start drawing again, compositions of these simple organic shapes. I didn’t even know why I was doing them or what they were for, but it was like playing and investigating. I then realized that I wanted to make these in three dimensional form. I wanted to bring these forms to life. But wool, the media I was so used to, wasn’t going to work, so I chose wood.
After teaching myself how to use a jigsaw, I crudely cut the shapes from my drawings in bits of wood I found lying around. My partner Jon is a product designer so he had the tools, and the expertise to advise and help me bring these drawings into something solid, but it took a lot of cutting, sanding and pain to get them to join together the way I wanted them to. We decided to plot the shapes on a 3D program and then get them cut out by CNC machine, so we could get a bit more accuracy. This is the first one, which chipped and marked and didn’t match. It was so good!
Eventually, though trial and error, and slowing the CNC down, we got a better finish, the Douglas fir is a beautiful wood, but it has soft and hard lines within it, which means some parts cut easily, some don’t and it sands down too quick in places. I was learning about working with wood, and that it is a moving, living thing.
The next stage was figuring out how to join all the pieces, we needed to make sure that it was strong enough for a chair back and even though they were going to be more of a work of art, people were still going to use them. Jon used a domino machine, which cuts slots in the wood, so that another piece of wood can be inserted holding the two parts together. There were a lot of tight angles on these shapes, and I didn’t want the dominos to be seen.
The pieces were all laid out and individually sanded by hand, so that the edges where smooth, ready for painting.
The first time I painted all the shapes for one chair I mixed my own colors, and I had to repaint the wood so many times and could never get the same color exactly again, so the piece evolved constantly. I’d try one color, but when it was put into position next to another color, I didn’t like it, so had to paint again and again until the color balance was completely right to me.
Meanwhile Tommy sanded the legs and the seat bases and made tiny wedges to hold the legs in place. Sanding is one of my least favorite parts, but it’s also one of the most important if you want a good finish.
Seat base is cut. For this I didn’t want to use any template, instead favoring a low tech, spontaneous approach – I freehand drew a roundish shape, hoping that each chair would be slightly different from the other, the legs were assembled through the holes, and double wedges glued in. This would then be cut off at the same height as the seat, and sanded smooth, I really love this detail of traditional carpentry.
Second, third, fourth coat. The painting of the shapes was so enjoyable, I feel like I’m making compositions just as a painter would do. I think this is an unfinishable job, but I had to stop at some point.
The parts for each chair were laid out and ready for assembly, they would be attached with their dominos, glued and clamped and their butterfly joints would be glued into place.
Jon cut down any extra height on the butterflies with a Nokogiri Japanese saw.
Inspection time, making sure all the elements are painted, or pencil marks are rubbed off, and the surfaces are clean and smooth. Any dents in the surface of the wood are steamed which makes them magically pop out.
Finishing touch – the chairs are all sent to the sprayers who cover them in a coat of water-based lacquer. This seals in all the color, and makes them more durable.
The finished product, each piece completely unique, as no two will be painted the same. The abstract assembly chair marks a turning point in my work, I can get lost in concentration when I’m making these pieces, and they are something I’d love to have more time to make and develop.
For more information on Abstract Assembly or to purchase, visit donnawilson.com.
from WordPress https://connorrenwickblog.wordpress.com/2020/08/18/the-making-of-abstract-assembly-by-donna-wilson/


No comments:
Post a Comment